How to Fix a Leaking Bathroom Faucet
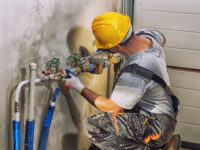
If your bathroom faucet is leaking, you can usually fix it yourself with the right tools and replacement parts. Start by shutting off your water supply valves and plugging the sink drain.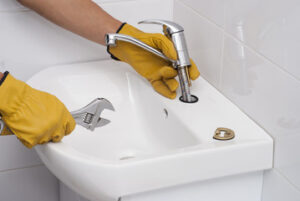
Next, pop off the handle knobs with a flathead screwdriver and remove them to expose the screws that mount them to the stem. If they seem seized, apply penetrating oil to loosen them. However, of you need professional help, call Plumber Montgomery TX now!
The handle is a very important part of the faucet because it works with the cartridge to control the flow of water. It’s also one of the most visible parts of the faucet, and when it’s damaged or loose, it can cause problems with the whole system. Fortunately, a little bit of patience and a few simple tools can fix a loose or broken handle. First, shut off the water supply by turning the valve handles counterclockwise. If you’re unsure of how to do this, consult a plumbing professional for guidance. Next, remove the decorative cap, button, or plug that’s on top of the faucet handle (this varies from model to model). Use a flathead screwdriver to pry this off and expose the screw underneath. Once you’ve exposed the screw, unscrew it and pull off the handle.
If the screw is seized, try using penetrating oil to break up any rust or sediment that may be keeping it from coming out easily. Once the handle is removed, carefully remove the handle plate and set it aside. Keep track of all the screws you remove, as you will need to put them back in the same order when you reassemble the faucet.
Beneath the faucet handle is the cartridge seat (also called a “seat washer”). If it’s worn out, your faucet will leak around the handle. This can usually be fixed by removing the cartridge and replacing it with a new one.
A small wrench is typically used to tighten this nut, but you can often just turn it by hand if the faucet isn’t too old. Once the nut is loose, the cartridge will lift right out.
There are two possible causes of a leaking cartridge: the inlet or outlet seals could be worn out, or the disc itself might be cracked from wear. If the inlet seals are worn out, you can replace them with a neoprene washer. Otherwise, you’ll need to replace the entire cartridge. You can usually find the replacement at your local hardware store or online. Be sure to match the size of the replacement with the existing cylinder openings, and make sure the threads are flush.
Spout
The spout is the part of your faucet that holds the water and controls the flow. It is the most important part of your faucet and often the most noticeable, especially when it is dripping. The spout of your faucet can leak from several different areas, so it is important to examine the area closely and determine where the drip is coming from so you can fix it properly. Faucet spout leaks can occur in the spout neck, at the valve stem, or at the spout cap and handle.
The first step is to turn off the water supply to your leaking faucet. This can be done by turning off the water valves under your sink or, if you have no shutoff valves, by closing the main water line to your home. Once the water is turned off, remove the spout by unscrewing it from the faucet handle. Then, use a rag to cover the opening of your sink drain in order to trap any water that may leak out and prevent it from flowing into your drain and into your home.
If your spout is leaking from the faucet neck, it could be because of worn rubber or neoprene seals, washers, or O-rings. In most cases, replacing these parts should resolve the problem. However, if the spout still leaks, the valve seat or cartridge might need to be replaced.
A common cause of a leaky spout is mineral buildup on the valve seat. To clean it, you can use distilled white vinegar or another mild acid. You can also try sanding the seat with an electric grinder, but only as a last resort because this will damage the surface of the valve seat.
To replace a disc cartridge, you will need to remove the handle and the spout assembly. To do this, you will need to remove the escutcheon cap, unscrew the disk cylinder mounting screws, and lift out the cylinder. Once you have removed the cylinder, you can examine it for wear and replace the seals as necessary. When reassembling your faucet, make sure that all connections are tight and secure, and use plumbing tape to ensure a watertight seal.
Cartridge
A faucet cartridge is an important part of the overall system and, if it’s worn out or damaged, it can cause your whole faucet to fail. The cartridge contains metal discs that control the flow of water by opening and closing different ports. Over time, these discs can wear out or become clogged with hard water deposits, and this causes the faucet to leak or not work correctly. Fortunately, the cartridge is an easy part to replace, and doing so will fix most faucets that are leaking or not working properly.
Start by shutting off the water supply to the faucet, usually by turning the valve underneath the sink clockwise until it is completely closed. Next, remove the handle(s). For most faucets, this is simply a matter of pulling off the decorative cap or button at the top of the handle, and then using a screwdriver to remove the screw that holds it in place. Once the handles are removed, you can unscrew the large nut that holds the cartridge in place. Some older faucets may have a bonnet nut that you will need to loosen with a wrench before the cartridge can be removed. Once this is done, you should be able to pull the old cartridge straight out. If necessary, you can use pliers to help pull it out. Once the cartridge is out, take a look at it to see if there are any visible signs of damage or wear. Some older cartridges have a brass screw on top that helps hold the cartridge in place; if this is present, you will need to replace it with a new one. Also, make a note of the orientation of the cartridge so you will know how to install the new one.
Purchase a replacement cartridge at your local hardware store or home center, and follow the instructions on how to install it. Most replacement cartridges come with new rubber O-rings, which you will need to install as well. To make installation easier, you can apply a small amount of nontoxic plumber’s grease to the new O-rings before inserting them into their grooves. Once the cartridge and O-rings are installed, you can reconnect any parts that were removed to shut off the water supply, then remove the decorative handle covers and replace them.
Cylinder
The cylinder of a faucet is where the water valve stem meets the cartridge. A leaking faucet from this part could be due to pitting, looseness or even corrosion of the seat washer. A good faucet repair kit will include replacement washers and seats to prevent this issue. Before you begin to work on the cylinder, make sure that the handle and spout are off. You should also turn off the water supply at the main valve and drain the faucet.
You may think that the cylinder of a faucet is an unusual shape, but it is very common. Examples of it can be found in gas cylinders, fire extinguishers and cold drink cans. It is also used to measure liquid and other substances.
A cylinder is a 3D solid shape that has two parallel circular bases separated by a curved surface. It has no vertices and it is possible to find its volume by multiplying its radius (r) by its height (h).
When used without qualification, the term “cylinder” usually refers to a circular right cylinder, a particular type of solid in which the centers of all circles that are intersected with its caps lie on a single line. However, a cylinder can also be oblique, in which case the circles do not intersect directly but are offset by an angle.
To repair a faucet with a cylinder, first open the handle and remove the cover to get to the set screw. You can unscrew the handle with an Allen wrench or use a spanner tool from a repair kit.
Next, you will need to remove the cartridge by unscrewing the cap by turning counterclockwise. After that, you can examine the cartridge to see if it’s worn out or cracked. It’s best to replace the whole cartridge if it shows signs of wear.
The adjusting ring that holds the cartridge in place is also likely to show signs of wear, especially if the handle was moved recently or there was a lot of pressure exerted on it. You can easily replace the adjusting ring by hand by using a spanner wrench or pliers from a repair kit.